(or how to document your own idiocy and publish it for all to see)

Mistakes. There are many resources on the web that explain in detail how to do things. The purpose of this page is to explain in detail how NOT to do things. Read on...
Change intake manifold = broken pushrod
When replacing the intake manifold on a small block Chevy engine, please keep in mind that the center two bolts on each side intersect with the pushrod holes. There is
no doubt about this as I successfully broke one pushrod and scored 3 others by using the stock manifold bolts on an aluminum manifold with shorter bolt hole shoulders. There was not much more than a 1/4" difference, but the results were immediately noticable and totally unacceptable as seen in the pictures below.
Lesson to learn: Know how long your bolts are supposed to be.
The new GM 2 piece pushrod...NOT!
When this happened, it made ugly noises. Fortunately, no internal damage occurred
They do bend quite a bit before they break
He shoots....He SCORES!!!!
Stop thermostat housing leak = stripped hole in aluminum manifold
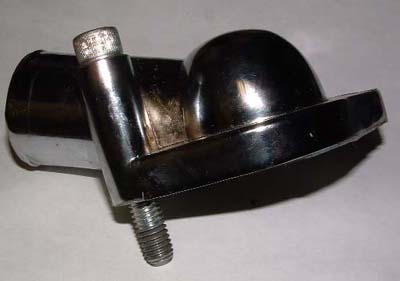
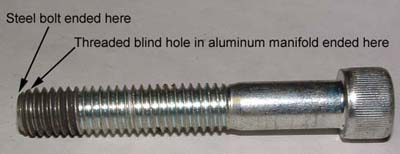
You can not stop the thermostat housing from leaking if you are using a 2 1/2" bolt in a 2 7/16" deep hole. The end of the bolt will bottom out before adequate compression of the gasket can occur. If this happens, get a shorter bolt, DO NOT use your super human strength and the longest Allen wrench you can find to apply more pressure, although this method does provide very tidy bits of aluminum embedded in the bolt threads. I have often said that nothing beats Loc-Tite like a good cross thread, but stripped threads require a quite different approach. Thankfully, the folks who make heli-coils understand the masculine trait that causes us to think if tight is good then tighter is better.
Lesson to learn: Know how long your bolts are supposed to be. (weren't we supposed to learn this lesson in the example above?)
The assembly
The villan
The fix
Attach loose tail light trim = create work of modern art
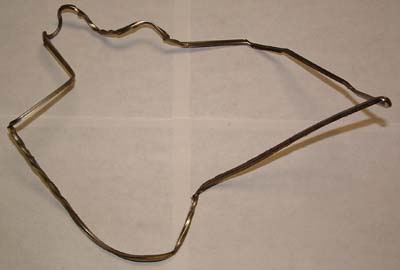
It was such a simple thing. The stainless steel trim on my tail light was coming loose, so I needed to re-affix it. I go to the store and find a suitable adhesive (will glue anything to anything). Here is where the project first begins to go terribly wrong, I read the instructions on the adhesive. They indicated that the surfaces to be joined should be free of all substances currently known to man prior to applying their most excellent product. Hmmm, there is old adhesive in the trim piece, this will have to be removed prior to using this product. I could use a folded piece of sand paper to clean the old residue from the channel, but where is the fun in that? Especially if you own a 1/2 HP grinder from Harbor Freight that is equipped with a brand new wire wheel. This will be much faster and easier (not to mention more fun) than using a stinky old piece of sandpaper. To the basement I go, hit the switch on the grinder and listen with anticipation as the wheel reaches it's terminal velocity of 3,500 RPM. First pass, most excellent, second pass, still most excellent, third pass and the trim is removed from my hands with a speed approaching Warp 7. The trim embraces the wire wheel with such force as to immediately reduce my 3,500 RPM beast to a 0 RPM humming machine. "Yoiks" I said and quickly hit the off switch. Results are shown below.
Lesson to learn: The best way to do things is not always the fun way to do things.
This what it's supposed to look like
This is what mine looks like
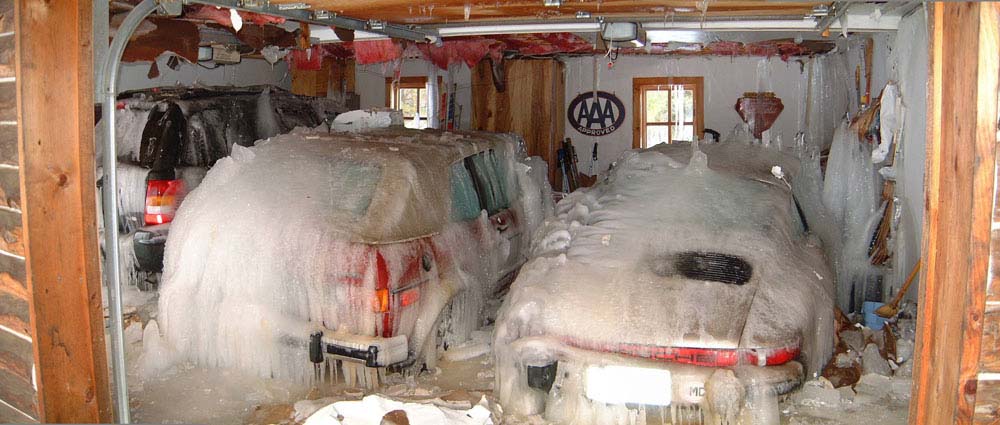
This one is not my mistake, and they're not Camaros, but I still thought it deserved honorable mention in the Hall of Shame...
Apparently, when you live in Minnesota, and you go away on vacation, and it's the middle of winter, you should turn off the water just in case a pipe breaks...